Setting up your Mac for accessibility testing
Set up your Mac to perform keyboard testing more easily, and access its built-in accessibility features more easily.
Note: This guide was written in 2024 on a Mac with macOS Sonoma installed. If you’re using an older version of macOS then you may find this article from A11Y Project more appropriate to help configure your settings.
Show accessibility shortcuts in the menu bar #
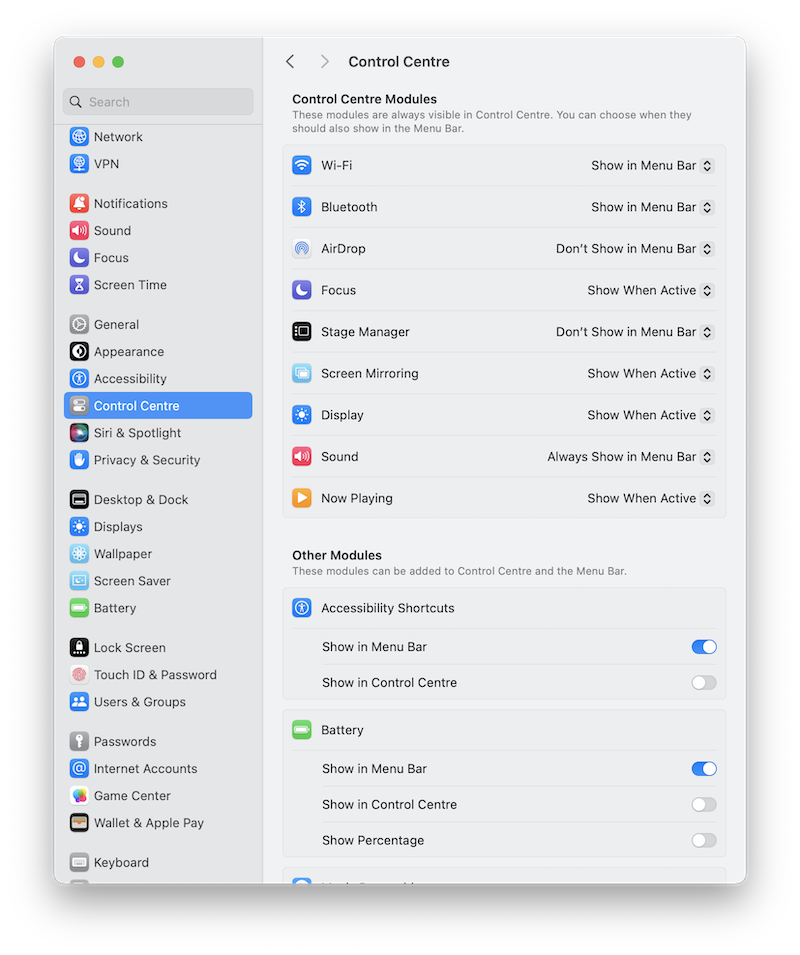
The quickest way for many users to open and toggle on/off accessibility features in macOS is through the menu bar accessibility shortcut. This can be enabled by going to System Settings > Control Centre > Other Modules > Accessibility Shortcuts and check Show in Menu Bar.

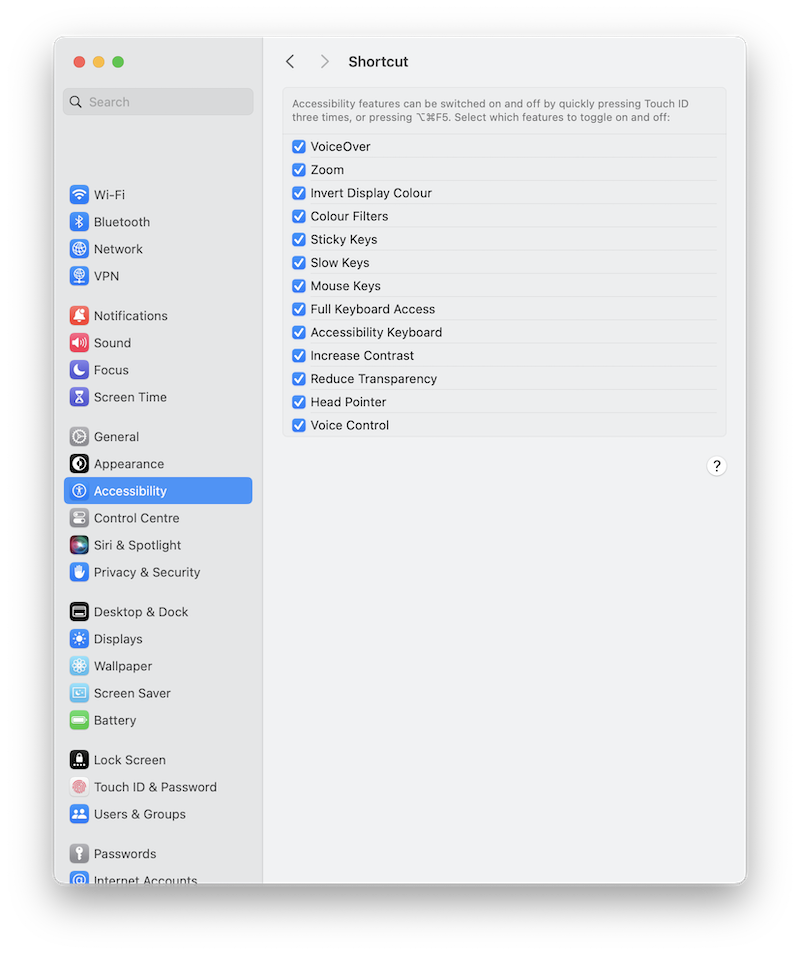
Next go to System Settings > Accessibility > General > Shortcut and check all the features to show in the shortcut menu.

Keyboard testing in Firefox #
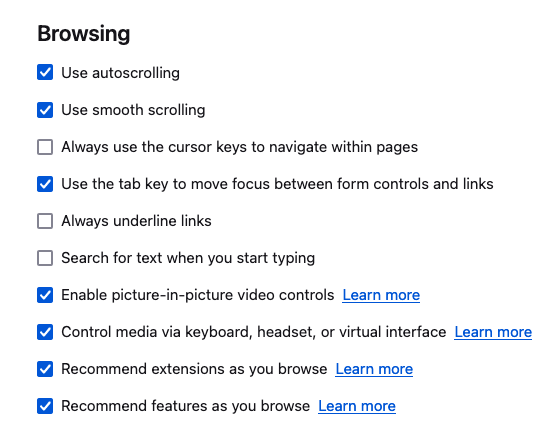
To allow for full keyboard navigation of all focusable interactive elements in Firefox, open settings from the menu bar and check the option “Use the tab key to move focus between form controls and links”.

Keyboard testing in Chrome #
There’s a similar setting in Chrome for enabling full keyboard navigation of all focusable interactive elements that’s usually switched on by default. If it isn’t then open Chrome Settings > Appearance and check the option, “Pressing Tab on a web page highlights links, as well as form fields”.

Keyboard testing in Safari #
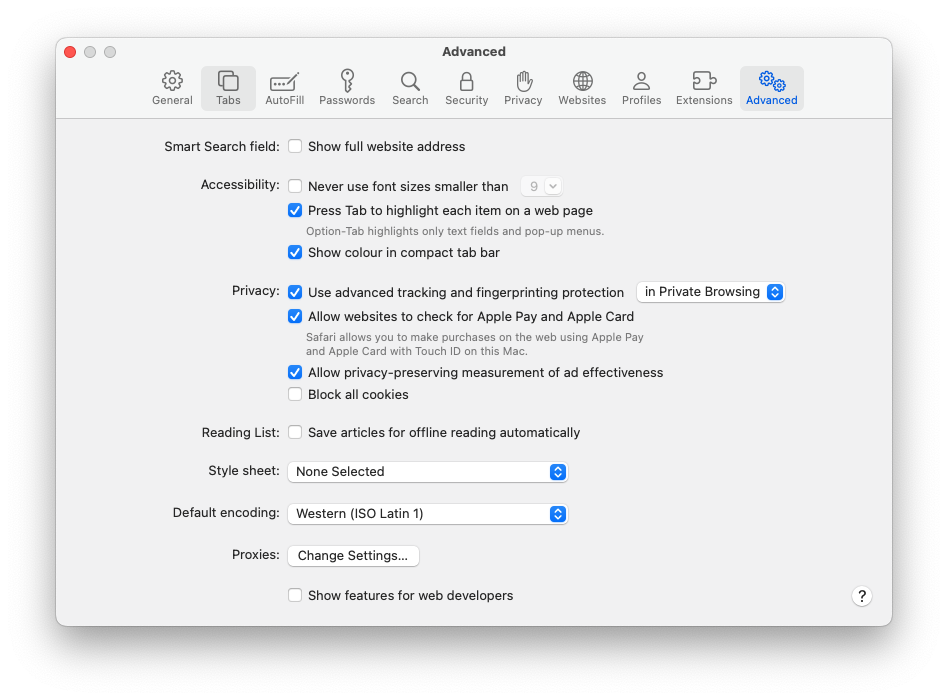
In Safari you’ll need to enable full keyboard navigation of all focusable interactive elements by going to Settings > Advanced in the menu bar and enabling the option “Press Tab to highlight each item on a web page”.

 dxw Accessibility Manual